Water Main Pressure Testing and Disinfection

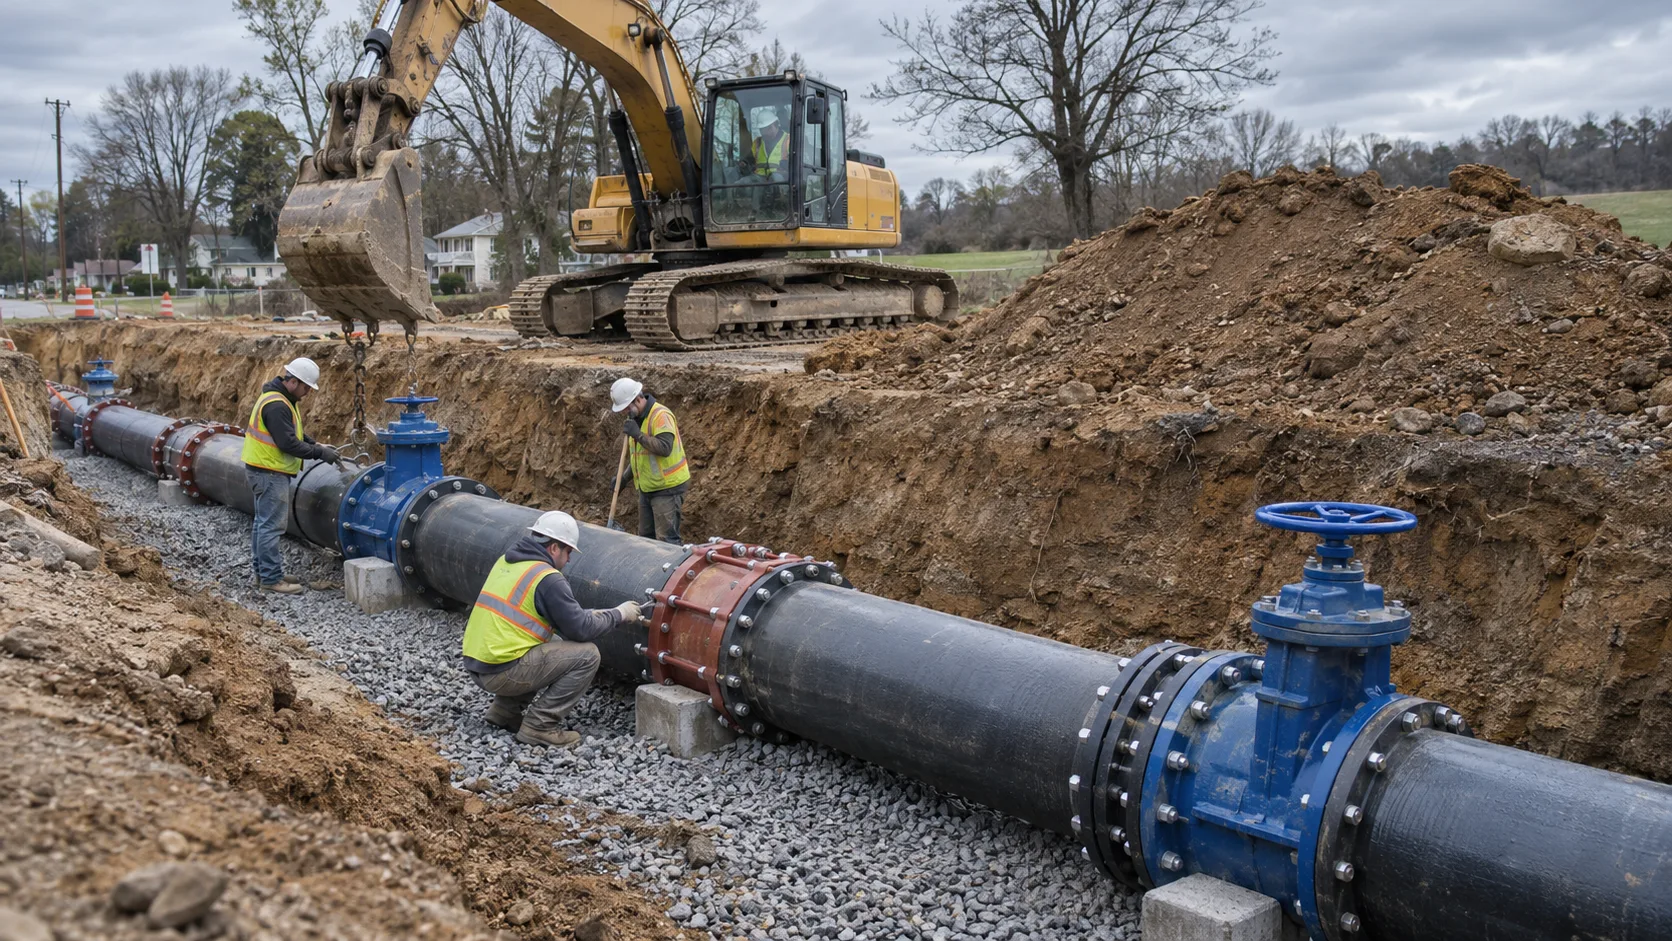
A water main is accepted twice: once when it holds pressure and once when the lab says the water is clean. Both tests happen after the pipe is in the ground and before the line is tied into the distribution system, and failing either one means uncovering joints, re-chlorinating, and starting the paperwork over. The work is not complicated, but the sequence is unforgiving.
The governing references are ANSI/AWWA C600 for installation and hydrostatic testing of ductile-iron mains, AWWA C605 for PVC, and AWWA C651 for disinfection. Local specifications add their own limits, and the stricter document governs. Most of the numbers below come from state and utility specifications that apply C600 and C651, so they are the values an inspector is likely to ask for.
What the Pressure Test Actually Proves
A hydrostatic test proves that the pipe, joints, fittings, valves, and thrust restraint can hold the design pressure without losing water beyond an allowance. It does not prove water quality, and it does not find every defect: a joint that seeps a cup an hour can pass a leakage allowance and still fail in ten years. That is why the standards require repairing all visible leaks whether or not the test passes.
Think of it as two gates with different failure modes. Pressure and leakage are mechanical. Bacteriology is sanitary. A crew can pass the first and fail the second on the same line, which is why the disinfection and sampling steps cannot be treated as paperwork that happens after the real work.
Test Pressure, Duration, and Where You Read the Gauge
The common specification is a test pressure of 1.5 times the system working pressure or 150 psi, whichever is greater, held for two continuous hours. Pressure must not drop more than 5 psi during the test, and the gauge is read at the low point of the test section because that is where the pressure is highest.
Elevation matters more than most crews expect. One psi equals roughly 2.31 feet of water head, so 20 feet of fall between the high and low ends of a test section changes the reading by close to 9 psi. Testing without accounting for that will either overpressure the low end or leave the high end below the required minimum.
Before any of that, the alignment has to be clear of other utilities. Calling 811 and, where marks are uncertain, test pits and potholing are what keep a water main from becoming a gas line story.
The test section also has to be isolated from the live system and from any point of use, and unrestrained ends, caps, tees, and valve bodies must be braced or restrained before pressure goes on. Air must be expelled before the test starts. A section that is pressurized with air pockets in it will creep for hours and look like a leak when it is only compressed air finding equilibrium.
Fill Slowly and Get the Air Out
Air is the most common reason a new main will not hold a test. Filling at a controlled rate, venting at high points, and giving the line time to stabilize before the clock starts solves most of it. Temperature is the second cause: water and pipe warm up through the day, pressure rises, and a night-time reading can drop several psi with no water leaving the line.
The practical rule is to fill, vent, and let the section sit long enough that the gauge stops drifting before the two-hour test begins. Record the start pressure, the time, the gauge identification, and the makeup water added. If a drop recovers as the day warms, it was thermal. If it does not, it is a leak or a bad gauge.
The Leakage Allowance Math
Leakage is measured as the water pumped into the section to hold test pressure, plus the water needed to bring the line back to test pressure at the end. For ductile iron, the standard allowance is:
L = (S × D × √P) ÷ 148,000
Where L is allowable leakage in gallons per hour, S is the length tested in feet, D is nominal diameter in inches, and P is the average test pressure in psi. A 1,000-foot run of 8-inch main at 150 psi works out to about 0.66 gallons per hour, so roughly 1.3 gallons over the two-hour test. That is not much water, which is why the makeup measurement has to be done with a meter rather than a guess.
PVC specifications use a joint-count formula instead, because leakage is concentrated at joints rather than distributed along the pipe wall. Whichever formula applies, the mechanics are the same: measure what goes in, compare it to the allowance, and repair anything visible regardless of the number. A line that passes on paper but shows a wet joint at the bell is not finished.
Thrust Restraint and Why Ends Move
Pressure tries to push every change in direction apart. Caps, tees, bends, reducers, and valve bodies all generate thrust, and an unrestrained plug at the end of a test section is a projectile with a few hundred gallons of water behind it. Restrained joints, tie rods, thrust blocks, or mechanical restraint must be installed and cured before the test, not after.
Keep people out of the line of fire during pressurization, and never stand over a plug or a valve while the gauge climbs. The test is also the moment to confirm that valves are open through the section, that service connections are valved off, and that nothing is being tested that was not designed for the pressure. If the section includes pipe with a lower rating, the test pressure is set by the weakest component.
Disinfection: Pick the Method Before You Fill
AWWA C651 offers four methods, and the right one depends on pipe size, how clean the installation stayed, and how much water the job can afford to waste. The tablet method uses calcium hypochlorite tablets placed inside the pipe during installation to reach an initial dose of 25 mg/L, held at least 24 hours, or 48 hours if the water is below 41°F. It only works on pipe that can be kept clean and dry, it cannot be preceded by a flush, and it is limited to smaller diameters.
Continuous feed is the general-purpose method: fill and flush the main, then refill it with water chlorinated to 25 mg/L, hold 24 hours, and confirm a free chlorine residual of at least 10 mg/L at the end. The slug method runs a 100 mg/L slug through large-diameter mains for at least three hours and requires the residual to stay above 50 mg/L as the slug moves. Spray disinfection at 200 mg/L for 30 minutes is used on large transmission mains where filling the whole line is impractical.
The residual requirement is what separates a real disinfection from a symbolic one. If the pipe went in dirty, chlorine demand eats the dose and the residual test at the end of the hold period fails. That is a sign to clean and repeat, not to add a little more chlorine and hope.
Flushing Before and After
Pre-flush removes the grit, cuttings, and debris that would shield bacteria from the chlorine. C651 calls for a scour velocity of 3.0 feet per second, and the standard includes a table of flow rates and tap or hydrant combinations needed to reach it at 40 psi residual pressure. An 8-inch main needs roughly 470 gpm, a 12-inch roughly 1,060 gpm. Under-flushing is the same as not flushing.
After the hold period, flush again until the chlorine residual matches the system the line will join. Then dechlorinate before the water leaves the site. Highly chlorinated test water discharged to a storm drain, ditch, or stream is a regulated discharge and can kill aquatic life; sodium thiosulfate, sodium bisulfite, sulfur dioxide, or ascorbic acid are the usual neutralizing agents, and many utilities require approval before any of it goes to the sanitary sewer. AWWA C655 covers field dechlorination practice.
Bacteriological Sampling and the Isolation Rule
Sampling is where a good installation gets held up by a lab result. For new mains, C651 requires two sets of samples that both pass, collected either at least 16 hours apart, or 15 minutes apart after the line has rested at least 16 hours without water use. Samples are taken at intervals along the line, with more frequent sampling if trench water or heavy debris entered the pipe.
Until both sets pass, the new main stays isolated from the active system. Tying in early, even to "let the neighbors have water," can create a cross-connection and is exactly the failure the sampling rule exists to prevent. If coliform shows up, the fix is to re-chlorinate, flush, and sample again, not to resample until a clean bottle appears.
Sequencing on a Real Job
Testing is a scheduled event, not something that happens when the crew finishes. Utilities typically want notice, often 48 to 72 hours, and a witness on site for the test and the disinfection. The practical sequence is: install and restrain, flush, disinfect, hold, flush again, test pressure and leakage, sample, and only then tie in.
Some specifications allow the pressure test before backfill so joints stay visible, which is faster to repair but leaves the trench open longer. Others require partial backfill with joints exposed. Either way, the record matters: gauge calibration, test pressure and duration, makeup water volume, chlorine dose and residual readings, lab results, and dechlorination method. That package is what gets the line accepted and what protects the contractor if a joint fails a year later.
Common Failures and What They Mean
- Pressure will not hold and keeps creeping down: air in the line, an unseated valve, a leaking test plug, or a joint that was never fully assembled.
- Pressure holds but leakage exceeds the allowance: small seeps at gaskets, service saddles, or valve packing, or a meter that is not reading what the crew thinks it is.
- Pressure passes, bacteria fail: inadequate contact time, low residual, dirty pipe, dead legs, or sampling from a hydrant hose instead of a clean tap.
- Residual collapses during the hold: high chlorine demand from debris or trench water, which means the line needs cleaning and a repeat dose.
- Test passes, then the utility re-tests after a repair: any repair that depressurizes or dewaters the line restarts the disinfection and sampling clock for that section.
None of these are mysterious. They are almost always a step that got compressed because the paving crew was waiting or the trench was open too long. The line either holds and samples clean, or the job is not done, and the standards are written to make that distinction hard to argue with.
Pre-Test Checklist
- Confirm the test section, the pressure, and the duration against the specification, and identify the lowest point.
- Verify all restraints, thrust blocks, and tie rods are installed and cured.
- Isolate the section from the live system and valve off services.
- Fill slowly, vent high points, and confirm air is out before pressurizing.
- Check gauge range and calibration; the test pressure should sit near mid-scale.
- Record start pressure, time, and any makeup water added.
- Flush at 3.0 feet per second before disinfection and again after the hold.
- Log chlorine dose, hold time, water temperature, and residual at each sampling point.
- Collect both sets of bacteriological samples and keep the main isolated until both pass.
- Dechlorinate discharge, document the method, and assemble the acceptance package.
For the excavation side of the same job, see excavating for water and sewer lines, backfilling a utility trench, dewatering an excavation, and flowable fill for utility trenches. Where a crossing cannot be trenched at all, trenchless methods change the testing sequence entirely. Where the line connects to structures, precast manhole installation and storm drain pipe installation cover the bedding and joint details that keep the test from failing in the first place.