Installing a Precast Manhole

A manhole is the one part of a storm or sanitary line that has to be perfect on the first try. The pipe can be re-laid, a catch basin can be rebuilt, but a manhole that is out of plumb, sitting on bad bedding, or leaking at a joint is buried under compacted backfill and, eventually, under pavement. Precast manholes make the work faster than cast-in-place — a crew can set one and backfill the same day — but the speed only helps if the excavation, bedding, joints, and grade adjustment are done in the right order.
Why Manholes Fail
Most manhole problems trace back to four causes, and all four are decided before the backfill goes in.
The first is settlement. A manhole is a rigid structure sitting in a trench backfill that will consolidate. If the bedding is uneven or the backfill around the structure is not compacted the same way the pipe trench is, the manhole stays where it is while the ground around it drops — and the pipe entering it shears or goes out of alignment. The zone directly under the pipe-to-manhole connections is the most vulnerable part of the whole assembly.
The second is water. A manhole collects groundwater on the outside and carries sewage or stormwater on the inside, and every joint and pipe penetration is a potential leak in both directions. Infiltration at manholes is one of the standard reasons a sanitary line fails its testing.
The third is buoyancy. An empty manhole in saturated ground wants to float. Precast concrete resists that far better than the alternatives — concrete has a specific gravity around 2.40, compared with roughly 1.86 for fiberglass and 0.97 for HDPE — but a shallow structure in wet ground still needs to be checked, and any pipe stubs have to be restrained so they do not blow out under groundwater pressure or during testing.
The fourth is grade. A cover that sits a half inch low holds water and a cover that sits high gets hit by a plow, a screed, or a tire. Getting the casting to finished grade is a separate operation from setting the structure, and it is the step most often rushed.
What You Are Actually Installing
A precast manhole is an assembly, not a single product. From the bottom up it is normally a base section with the pipe openings cast in, one or more riser sections, a cone or flat slab top, grade rings to make up the final elevation, and a frame and cover at the surface. Steps or ladders are cast or bolted into the wall.
The sections themselves are manufactured to ASTM C478, the standard specification for circular precast reinforced concrete manhole sections, which covers base sections, risers, cones, flat slab tops, grade rings, and steps. Knowing that the product is specified to C478 matters when you are buying: it establishes wall thickness, strength, joint details, and step loading, and it is the reference an inspector will ask about. Local agencies routinely layer their own requirements on top, so the project specification still governs where it is stricter.
Digging the Hole
The excavation has to be bigger than the manhole. It needs enough room to set the sections, work on the joints from the outside, and get a compactor around the structure — a hole cut tight to the base makes the backfill impossible to compact, and uncompacted backfill is how manholes end up leaning.
It is also an excavation under OSHA's rules, which means the same protections as any other dig. A protective system is required at 5 feet unless the excavation is entirely in stable rock, spoil and equipment stay at least 2 feet back from the edge, and a ladder or ramp is needed within 25 feet of lateral travel once the depth reaches 4 feet. Anyone working in the hole needs a way out that does not depend on climbing the trench wall. If the hole is deep enough to need a trench box or sloping, that decision has to be made before the first bucket — the same analysis that applies to any trench protection requirement.
Water belongs in the plan too. A manhole excavation that fills overnight cannot be bedded properly, and pumping it out at the last minute usually means working in mud. If the hole is wet, dewater it before bedding — the methods in dewatering an excavation apply directly — and keep the discharge out of any storm inlet. And before any of this starts, the locates need to be current and the private utilities on the site confirmed, which is the point of calling 811 before you dig.
Bedding: Foundation Plus Leveling Course
Manhole bedding is two layers, not one, and treating it as a single layer of gravel is a common shortcut that shows up years later.
The foundation is the layer that carries the load. It can be firm in-situ soil, or it can be a compacted mat of approved bedding material — the National Precast Concrete Association's installation procedure calls for that foundation to be compacted to a minimum of 90 percent Proctor density, with the foundation area extending at least 6 inches beyond the base in every direction so the structure is not sitting on a pedestal of softer ground.
On top of that goes the leveling course: a minimum of 3 inches of loosely placed granular material in NPCA's current procedure, intended to slightly consolidate when the structure is set. That is what gives the base uniform bearing. Without it, the base lands on a hard spot and a soft spot, and point loads open a crack at the first lift of backfill. Older NPCA literature in circulation specifies a 6-inch compacted bedding layer instead, and many local specifications follow the 6-inch figure — so read the project spec and follow whichever is stricter.
Whatever depth you use, the critical zone is under the pipe openings. The material beneath the incoming and outgoing pipes has to be firm and uniform, because that is where an unsupported pipe shears or deflects. It is worth compacting that area with a plate or rammer before the base goes down, and worth re-checking it after.
Setting the Base and Stacking Risers
Set the base on the graded bedding so that the pipe openings match the design elevations, then level the top of the base in both directions. Not one direction — both. A base that is level front to back and off side to side puts every riser above it out of plumb, and the error compounds with each section.
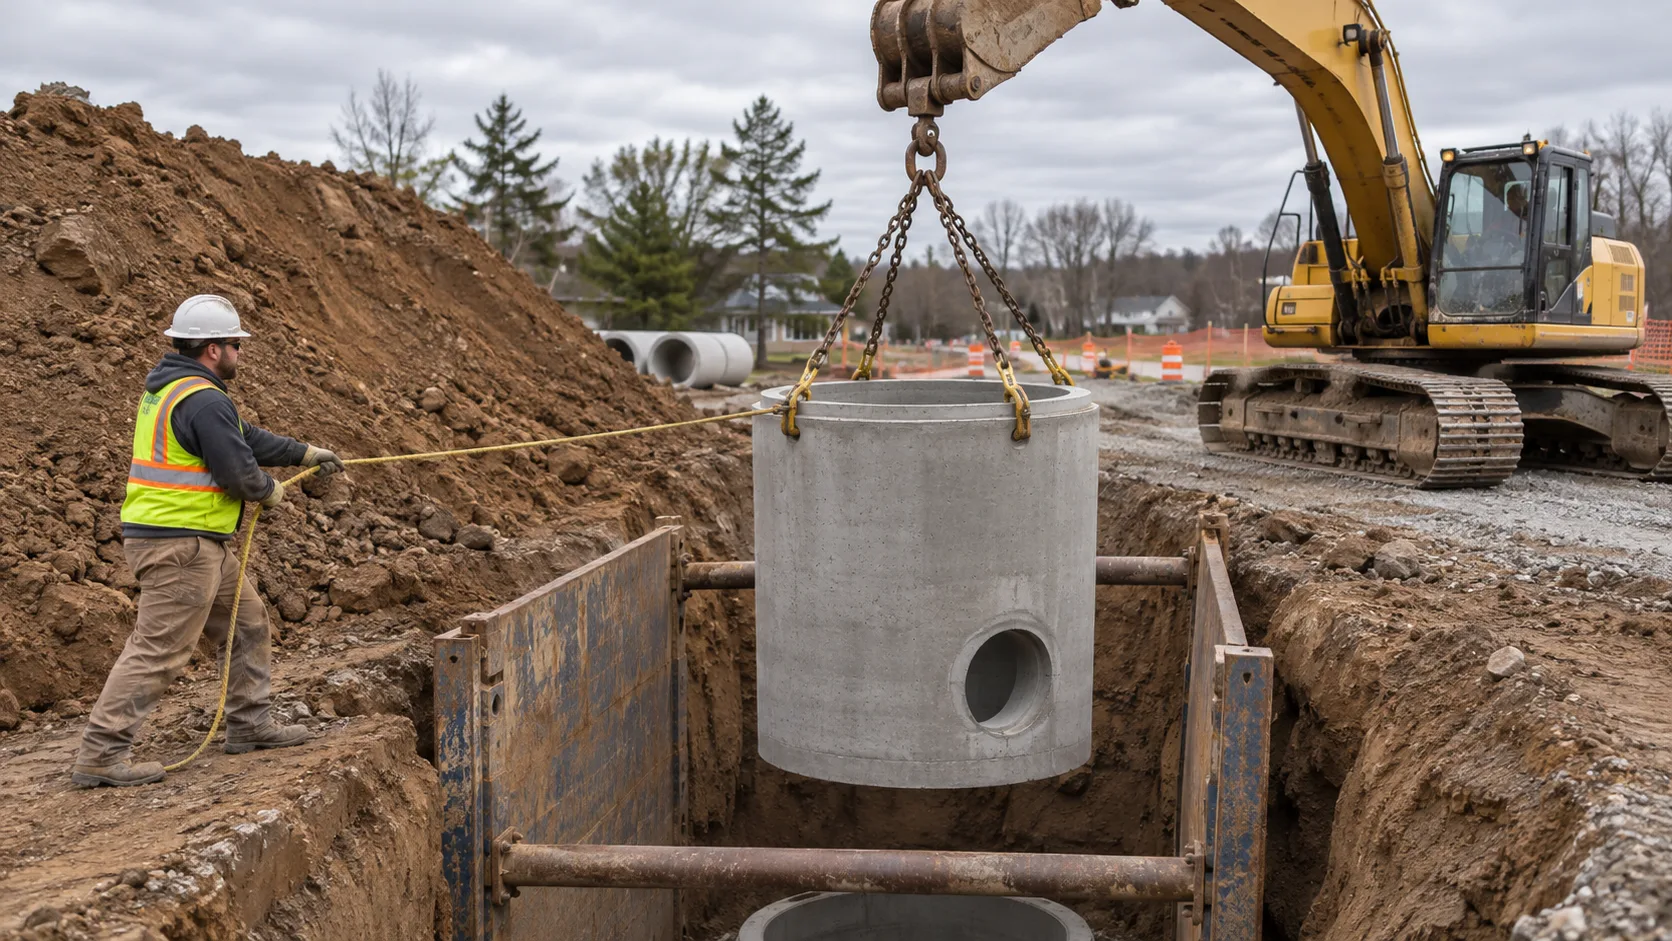
Handling is part of the job. Use rated lifting devices that meet OSHA's requirements, keep sling angles at 60 degrees or flatter, and use a spreader bar where the geometry will not allow it. Use every lifting point, with equal pick on each. Do not lift precast sections with a backhoe or front-end loader unless the machine is rated for the weight, and do not roll or push a section across the ground with equipment. The general rules for lifting with an excavator apply here, with the added wrinkle that a manhole section is a concrete product that chips and cracks if it is shocked.
Then stack. Each riser has to be plumb before the next section goes on, and the steps — where the sections carry them — have to line up into a usable ladder. A riser that is a half inch out looks like nothing at the time and becomes a cover that is off-center at grade.
Joints and Pipe Connections
Manhole joints are gasketed, and the gasket only works if the surfaces are clean and the joint goes together straight.
With a preformed flexible sealant, use the manufacturer's size for the diameter and joint space, clean the tongue and groove, and apply a primer if the surface is wet or the temperature is below 40°F. Wrap the sealant completely around without stretching it, overlap the ends, and knead the splice into one piece — an unkneaded lap is a leak path. Remove all the protective paper, then lower the next section carefully with the steps aligned.
With a confined O-ring or a profile gasket, the surfaces get cleaned and lubricated as the manufacturer requires, the gasket is seated against the shoulder with the nose facing the spigot end, and the diameter is equalized by running a smooth round object around the circumference before the section goes down. Keep the section plumb while setting it; a gasket that rolls out of its groove is how a bell gets broken.
Pipe penetrations come in three common forms. A flexible boot gets a clean pipe, the pipe centered and pushed flush with the inside wall or as the jurisdiction allows, and the take-up clamps seated in their grooves and tightened to the manufacturer's torque — with the pipe in straight alignment while the clamps are tightened, because tightening a deflected joint does not seat the clamp. A compression connector needs a bevel on the pipe end, lubrication, and the pipe pushed in level. A mortar joint needs non-shrink grout filling the void completely, cured before backfill. Any pipe stub left in a manhole has to be restrained so it cannot blow out under groundwater or during testing.
Frame and Cover to Finished Grade
The frame and cover are set last, and the elevation has to match the surface that will actually exist — not the subgrade, not the base course, but the finished pavement or final grade. Grade rings make up the difference, and the stack has to be built to the tolerance the agency requires.
Two things go wrong here constantly. The first is adjusting the casting before the pavement is placed, which leaves the cover low once the surface course goes down. The second is adjusting it after the pavement by sawcutting or coring a patch around the cover — a method that works but leaves a ring of new joints around a casting in the wheel path, which is exactly where pavement distress starts. Where a resurfacing is coming, cast-iron or steel riser rings can raise the frame without excavating it, but that is a separate product decision, not a substitute for setting the structure correctly the first time.
Get the frame seated on the grade rings with mortar or the specified bedding, check that the cover sits flush and does not rock under load, and confirm the elevation against the survey before the paving crew arrives.
Backfill and Compaction
Backfill goes in evenly on all sides. NPCA's guidance is explicit about this: distribute the fill around the manhole in equal proportions to prevent tipping, and compact it in lifts the same way the adjacent trench is compacted. Piling all the backfill on one side first is the fastest way to push a manhole out of plumb, and once it is out of plumb, no amount of compaction brings it back.
Lift thickness and moisture are the same as any other backfill — the material has to be within its moisture window and placed in lifts the compactor can actually densify, which is the subject of how thick compaction lifts should be. Around a structure, that usually means smaller equipment and thinner lifts than the open trench. The full sequence for bedding, haunching, and compaction is set out in backfilling a utility trench, and the same discipline applies here.
Where the trench is under pavement and the material is difficult to compact, flowable fill is a legitimate alternative — it eliminates the compaction problem entirely, at a cost. See flowable fill for utility trenches if that trade-off is on the table.
Test It Before You Bury It
Precast manholes can be vacuum tested before backfill, and that is the point at which a leak is cheap to fix. ASTM C1244, the standard test method for concrete sewer manholes by negative air pressure, draws a vacuum of 10 inches of mercury on the assembled structure with lift holes plugged and pipe openings temporarily plugged and braced, then measures the time for the vacuum to drop to 9 inches. The structure passes if that time meets or exceeds the value in the standard's table for its diameter and depth.
Two things are worth knowing about the test. First, it is a preliminary test of the installation, not a guarantee of long-term performance — it verifies that the sections, joints, and connections were assembled correctly. Second, testing after backfill is not recommended, especially where groundwater is present, because the combined vacuum and hydrostatic pressure can exceed the rating of flexible connectors. The resilient connectors themselves are rated to ASTM C923, which specifies a hydrostatic rating in straight alignment and a lower one at deflection, and that rating is what limits how much differential pressure the assembly can safely see.
If the manhole fails, it gets repaired by an approved method and retested. That conversation is much easier in an open hole than through a pavement patch.
The Pre-Backfill Checklist
Before the first bucket of backfill goes in, walk the structure and confirm each of these:
- Bedding depth and compaction match the specification, with firm support under every pipe opening.
- The base is level in both directions and the pipe openings match design inverts.
- Every joint is fully seated, with the gasket or sealant correctly positioned and the splice kneaded.
- All risers and the cone or top are plumb, and the steps line up.
- Pipe connections are tight, clamps are torqued in straight alignment, and stubs are restrained.
- The frame and cover elevation matches the finished surface, and the cover does not rock.
- Lift holes are plugged and any lift lugs are grouted.
- Vacuum test is complete and documented, and the excavation has a safe means of access and egress.
None of that is exotic. It is just the order of operations, done in the order it has to be done — and it is why a manhole that takes an extra hour to set is worth far more than one that has to be dug up in five years.