Building a Drainage Swale

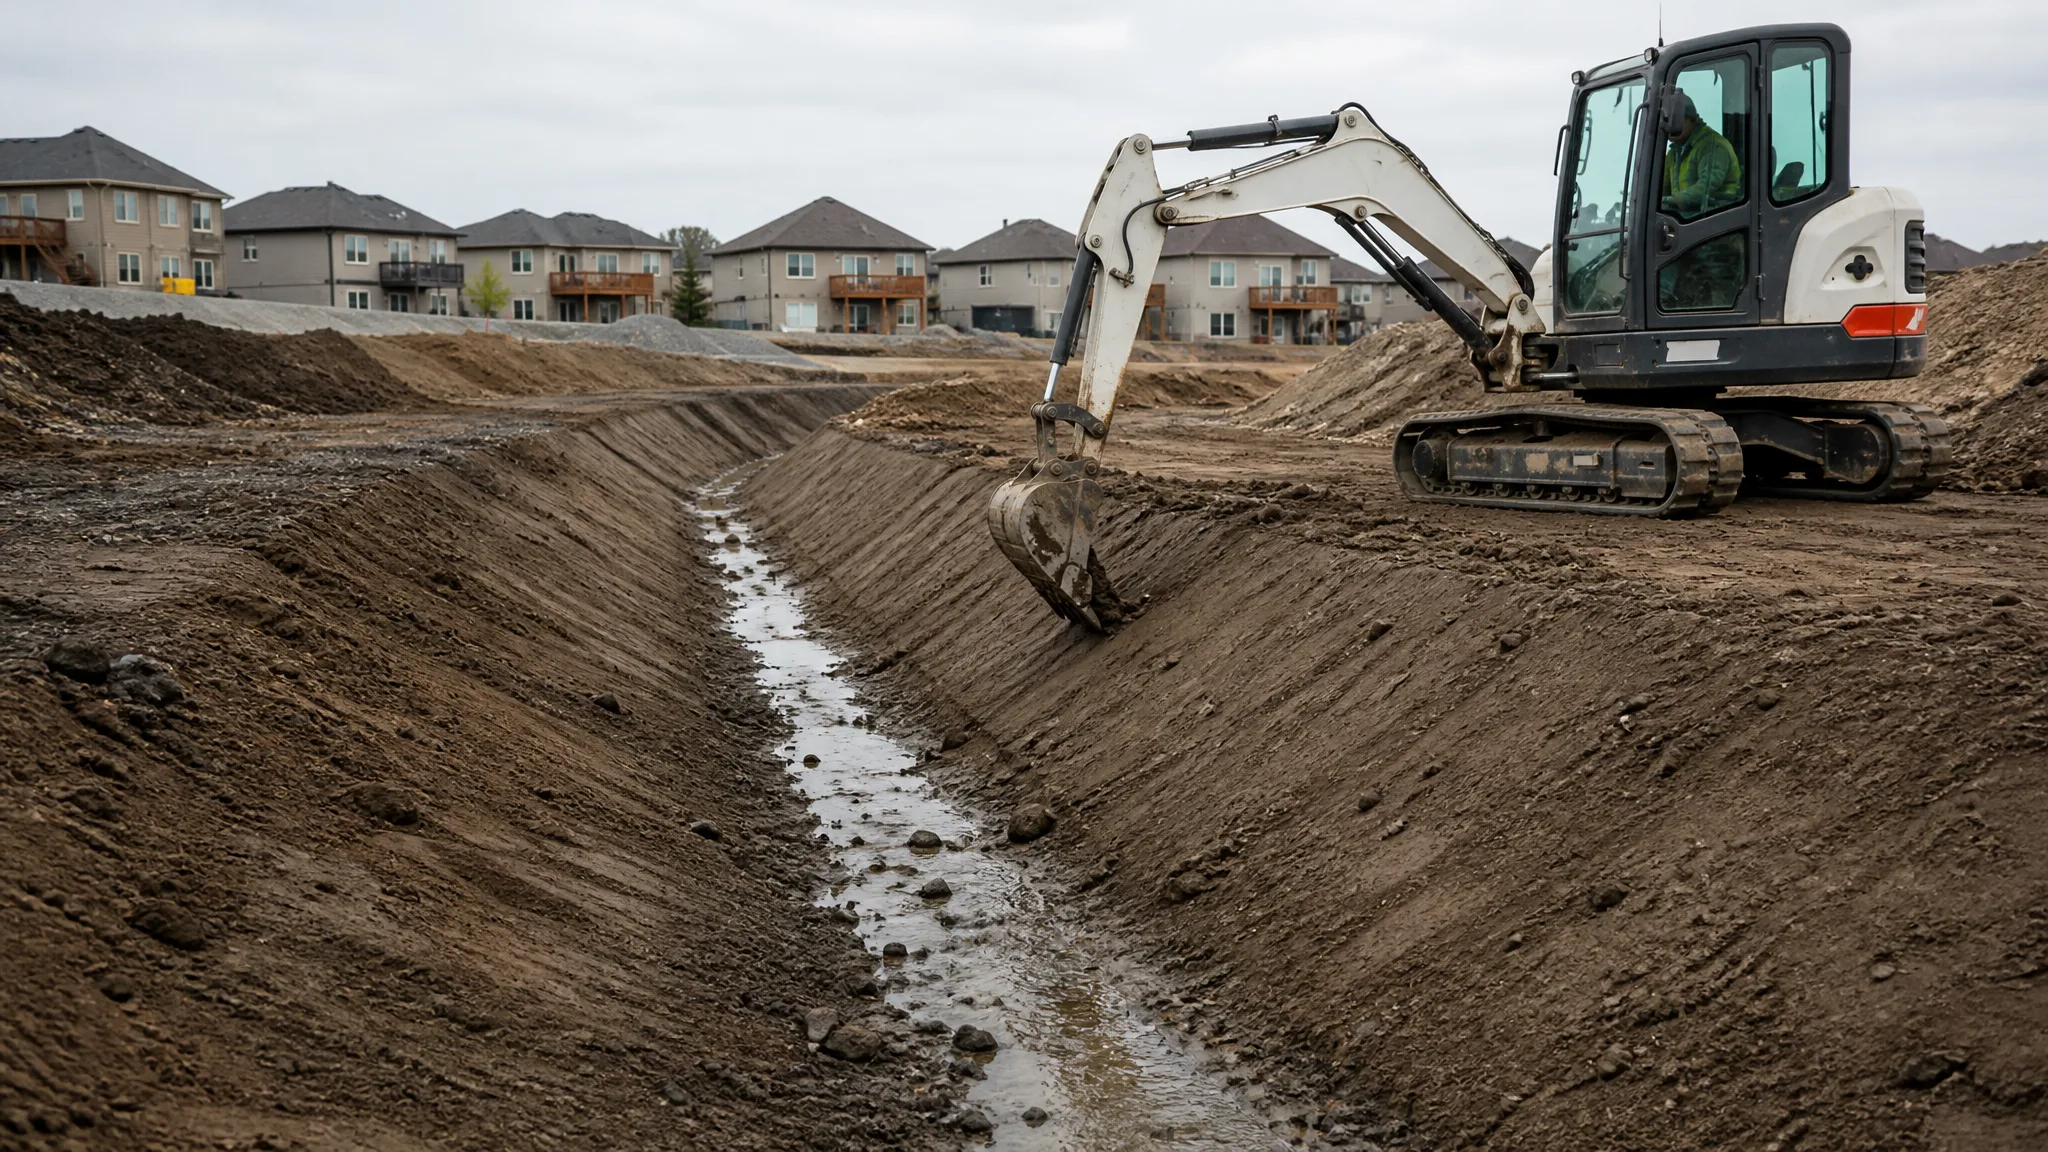
A drainage swale is a shallow, graded channel that collects surface water and carries it away from a building, driveway, or low spot to a safe outlet. It is one of the least expensive ways to fix a wet yard or a soggy jobsite, and it is also one of the easiest things to get wrong. A swale that is too flat pools water, a swale that is too steep erodes itself, and a swale that outlets nowhere floods the neighbor's lot. Get the geometry, the slope, and the lining right, and a well-built swale can handle runoff for decades with nothing more than mowing and the occasional raking.
What a Drainage Swale Is (and What It Isn't)
A swale is a broad, shallow depression shaped to move water across the surface. It is not a deep, narrow ditch. The wide, gently sloped profile spreads the water out, slows the velocity, and lets some of it soak in, which reduces erosion and takes pressure off downstream drainage.
It is also a surface feature, not a buried pipe system. A swale works purely on gravity and grade. Where a French drain relies on perforated pipe in a gravel trench, a swale simply shapes the ground so water follows the path you want it to follow.
Swale vs. French Drain vs. Catch Basin
These three tools solve different problems, and picking the wrong one wastes money. A French drain is best for subsurface water, a high water table, or a narrow area where you cannot dig out a wide channel. A catch basin captures water at a low point and ties it into a pipe or storm system. A swale is best for moving a large volume of surface runoff across open ground: along a property line, beside a driveway, across a yard, or around the uphill side of a house or building pad.
On larger sites, swales and buried systems usually work together. Runoff is collected in swales and routed to a catch basin or a stormwater detention pond, which is exactly the pattern many grading plans call for.
The Three Cross-Section Shapes
The cross-section you choose depends on how much room you have and how fast the water will move. The trapezoidal swale has a flat bottom with angled sides and is the most common shape for engineered drainage; typical bottom widths run 2 to 8 feet with side slopes of 3:1 (horizontal to vertical) or flatter. The parabolic swale has a smooth, curved profile that mimics a natural channel, is easier to mow, and looks better in a residential yard. The V-ditch has no flat bottom and concentrates flow, so it moves faster and usually needs a riprap or concrete lining to resist scour.
For residential work, angles steeper than 3:1 are hard to mow and prone to sloughing. Even where a steeper 2:1 side slope is allowed, it is rarely worth the maintenance headache near a home.
How Much Slope a Swale Needs
Longitudinal slope, the fall along the length of the swale, is the single most important number. For a vegetated swale, a grade between about 2% and 4% is the sweet spot, which is a drop of 2 to 4 feet over 100 feet of run. Below roughly 2%, water tends to pool and stagnate. Above about 4% to 5%, the flow gets fast enough to strip soil and vegetation.
If you have to run a swale on a steeper hill, the standard fix is not to live with the scouring but to break the slope up with check dams. Many design guides cap vegetated swales at under 4% unless those structures are added. Use a string line, a laser level, or a builder's level to set and hold the grade as you work; this is the same basic skill used to set grade anywhere on a site.
Sizing the Channel: Depth, Width, and Freeboard
Residential swales are generally shallow, with a depth of about 6 to 12 inches. The depth and width together must be enough to carry the runoff from the contributing area during a design storm without overflowing.
Capacity is calculated with open-channel flow math (Manning's equation), which factors in the cross-sectional area, the roughness of the lining, and the slope. You do not need to run the numbers by hand for a small yard swale, but the practical rule is simple: size it for the water it will actually see, then add freeboard. Freeboard is the height between the design water surface and the top lip of the channel, and a minimum of about 6 inches is a common target to allow for larger storms, debris, and sediment buildup.
Lining: Grass, Riprap, or Turf Reinforcement
The lining sets the maximum velocity the swale can handle before it erodes. Bare sandy soil may only tolerate about 1.5 to 2 feet per second, bare clay roughly 3 to 4, established grass 4 to 6, a turf reinforcement mat 8 to 12, 6-inch riprap 8 to 10, and concrete far higher.
Grass is the default for gentle residential swales because it is cheap, self-repairing, and slows the water. Riprap is the workhorse where flows or slopes run high; a riprap lining should use a stable rock size for the expected velocity, and the bedding matters as much as the stone. Turf reinforcement mats bridge the gap: they hold seed and soil in place while grass establishes, which is valuable on new construction where there is no time to grow a lawn before the first storm.
Check Dams for Steep Slopes
A check dam is a small weir built across the swale at intervals. Its job is to break a steep grade into a series of short, gentler pools, which cuts the water's velocity and reduces scour. Check dams are typically built from riprap or rock, with the center left slightly lower than the edges so water drops over the middle instead of cutting around the ends.
Common guidance for rock check dams is to keep them roughly 1.5 to 2 feet high with side slopes no steeper than about 2:1, embedded into the banks so water cannot escape around them. On a long, steep run, space them so the pools between them have a working grade of about 1% or less.
Where the Water Goes: Outlet Design
Every swale needs a defined outlet. Options include a storm drain inlet or catch basin at the downstream end, discharge to a larger channel or creek, or release into a dry well or rain garden where it can infiltrate. Whatever the outlet, protect the transition with riprap or another energy dissipater, because that is where water arrives fastest and where most erosion damage starts.
Never let a swale discharge onto a neighbor's property or toward a septic system or well. Before you dig, call 811 to locate underground utilities so the swale and its outlet do not conflict with buried lines.
Building a Swale Step by Step
Start by reading the land. Find where water comes from, where the low point is, and where it can be safely released. Mark the path and width with paint or flags, then confirm the yard slope and drainage support a continuous downhill run.
Strip and set aside the topsoil, then excavate the channel to the planned depth and shape, checking grade with a string line and level as you go. Use the spoils to build a slight berm on the downslope edge to define the channel and boost capacity. Finish by immediately stabilizing the bare soil: seed with deep-rooted, water-tolerant grasses, or lay erosion control blanket or turf reinforcement mat on areas that will see high flow.
Maintenance and Common Mistakes
Once built, the swale lives or dies on its vegetation. Keep grass healthy and mowed to roughly 3 to 6 inches, never scalped, because tall blades slow water and shield the soil. After heavy rain, clear leaves, sticks, and silt that can choke the channel; a clog forces water out of the intended path and starts new erosion.
The most common mistakes are all predictable: making the swale too flat so it pools, making it too steep so it cuts, digging it too narrow and deep so it becomes a ditch, forgetting freeboard, and failing to stabilize the bare soil before the next storm. Avoiding those five errors is most of what separates a swale that lasts from one that has to be rebuilt. Related reading: creating effective drainage systems during excavation and installing a silt fence to keep sediment on site while the swale stabilizes.