Building a Commercial Parking Lot

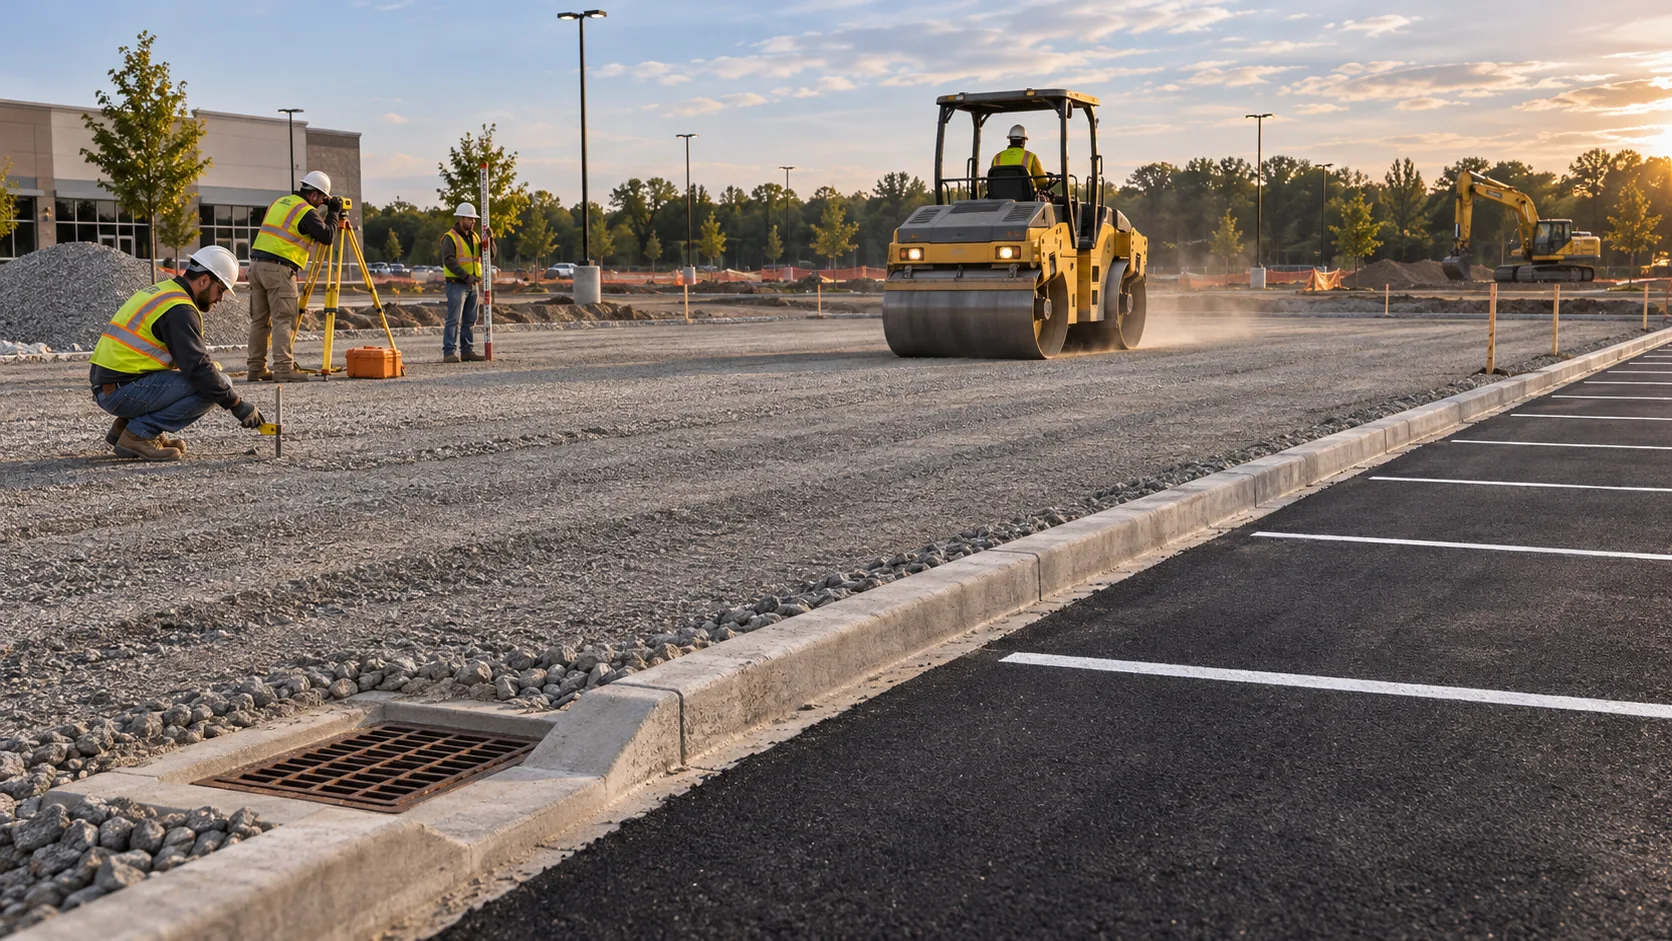
A commercial parking lot looks like a flat sheet of asphalt with lines painted on it. In reality it is three things stacked in a fixed order: a graded drainage surface, a compacted earth embankment, and a pavement section sized for a specific traffic load. Most of the failures that show up five years later, from alligator cracking at the entrance to ponding in the low corner, were decided long before the first load of asphalt arrived.
This is the site-work view of that job. It covers what a commercial lot actually has to do, which numbers govern the earthwork and grading, and where the money goes when the dirt is not right. For layer terminology, the companion piece on subgrade, subbase, and base course goes deeper on each course under the surface.
A Parking Lot Is a Drainage System With Pavement on Top
Water is what destroys parking lots. It softens the subgrade under a pavement section that was designed for a dry, compacted foundation, and then traffic loads that used to be spread across a stiff layer start pumping fines and cracking the surface. That is why every decision on a commercial lot starts with where the water goes: which way the surface falls, where the low points are, where inlets sit, and where the lot discharges.
Two consequences follow. First, the grading plan matters more than the paving plan. Second, the lot cannot be drained entirely by surface fall alone on a large site, so inlets, storm pipe, and often detention are part of the earthwork scope rather than an afterthought. The pieces that make that work are covered in installing a catch basin and installing storm drain pipe.
Layout Comes First: Where the Dirt Work Is Decided
Stall count, drive-aisle width, island locations, entrance spacing, and accessible-stall placement all get fixed on paper before a machine moves. A layout change after the subgrade is shaped means moving inlets, re-cutting grade, and rebuilding base, which is the most expensive kind of change on a parking lot project.
Typical practice for a shared entrance and exit is a driveway at least 24 feet wide to give two 12-foot lanes. Islands and medians separate parking from circulation and give snow storage and sign locations, but narrow raised islands under 10 feet wide do very little hydrologically and should generally be ignored when computing the runoff coefficient or curve number. Wider or depressed islands that collect runoff are worth counting.
Truck routes are the other layout trap. Entrances, perimeter travel lanes, dumpster pads, and delivery paths carry axle loads that the stall areas never see, so they need their own pavement design rather than inheriting the light-duty section. Once the layout is fixed, the site is ready for the sequence described in earthwork sequencing.
Stripping, Subgrade, and the CBR Number
Topsoil and organics come off first, across the whole footprint plus the areas that will be disturbed by equipment and stockpiles. What remains is the subgrade, and its strength is the single biggest input into pavement thickness. That strength is normally expressed as a California Bearing Ratio, or CBR, assigned by the geotechnical engineer from borings, laboratory testing, and local experience.
When soil tests are not available, one common public-agency design manual tells engineers to assume a CBR of 3 and a non-uniform subgrade, which is a deliberately conservative assumption that thickens the pavement. For reference, published parking-lot design guidance bands subgrade strength as weak at a CBR of 3 up to 6, moderate at 6 up to 9, and good at 9 and above.
Uniformity matters as much as the average value. A lot that is stiff in one corner and soft in another will crack over the transition, which is why proof rolling runs across the entire prepared subgrade before base goes down. Soft spots get undercut and replaced, not paved over.
The Pavement Section Comes From Load and Soil, Not Habit
Thickness is not a matter of taste. One widely used municipal design manual publishes flexible-pavement sections for light loads, defined as 200 or fewer cars per day and two or fewer trucks per day, of 5 to 6 inches of asphalt on 12 inches of prepared subgrade, dropping to 4 to 5 inches where a 4-inch granular subbase is added. For moderate loads of 201 to 700 cars per day and 3 to 50 trucks per day, the same tables run 5 to 7 inches of asphalt with a granular subbase of 6 to 8 inches.
Heavier areas are designed separately. Industry guidance for parking areas where trucks stop, load, and unload calls for a minimum of 6 inches of asphalt over 8 inches of aggregate base. Asphalt lift thickness in the 1.5 to 3.0 inch range is recommended to achieve density and durability, so a thick section is built in multiple lifts rather than one deep pass.
None of these numbers overrides the local ordinance, the geotechnical report, or the project specifications. They are useful for sanity-checking a plan and for understanding why a designer chose 5 inches on one site and 8 on another. Whatever the section, the base has to be built and tested, and gravel and stone sizes need to match the specified gradation.
Grading and Drainage: The Numbers That Keep the Lot Dry
Pavement needs fall. A slope of about 1.5 percent is commonly specified to move water and prevent standing water and ice. Minimum slopes as flat as 0.6 percent are permitted in some manuals, but only with supplemental measures such as slotted drains or pervious pavement, because flat areas multiply the risk of ponding. Slopes steeper than 5 percent are generally discouraged for vehicle areas.
The constraint that catches designers is the accessible route. Slopes greater than 2 percent between the parking destination and the accessible stalls make a compliant route very difficult to build, so the lot often has to fall in more than one direction, with inlets placed to pick up the low points.
That means the grading plan needs a low point that is actually an inlet, not a puddle. Inlets set a few tenths low, a bypass path for flows that exceed the grate capacity, and a positive outlet all belong in the plan. During construction, those inlets also need protection so sediment does not fill the storm system before the lot is even paved, which is the job of storm drain inlet protection.
ADA Parking Geometry: The Part Inspectors Measure
Accessible parking is where a finished-looking lot fails an inspection, because the requirements are dimensional and measured in the field. Under the 2010 ADA Standards, a car space must be at least 96 inches wide and a van space at least 132 inches wide, each with an adjacent access aisle at least 60 inches wide and as long as the space it serves. A van space may instead be 96 inches wide if the access aisle is also 96 inches wide.
Parking spaces and access aisles must be nearly level in all directions, with slopes no steeper than 1:48, which is roughly 2 percent, permitted only for drainage. Van spaces, their aisles, and the route serving them need 98 inches of vertical clearance. Signs must sit at least 60 inches above the surface measured to the bottom of the sign, and van spaces must be labeled van accessible.
The count is set per parking facility, not per site. A facility with 1 to 25 spaces needs one accessible space, and it must be a van space. The totals climb through 2 at 26 to 50 spaces, 3 at 51 to 75, 4 at 76 to 100, 5 at 101 to 150, 6 at 151 to 200, and 7 at 201 to 300, with at least one of every six accessible spaces sized for vans.
Two field details cause most of the trouble. Access aisles cannot overlap the vehicular way, and where the accessible route runs behind parked cars, wheel stops are the standard way to keep bumpers from blocking the required clear width. Grading crews should treat the 1:48 limit as a hard constraint, verified with a level, not eyeballed.
Curbs, Islands, Inlets, and the Details That Fail First
The structural details around the edges of a lot are where small errors become recurring maintenance. Curbs need to be set to the finished pavement elevation so the reveal is consistent and the lot drains to the inlets instead of the landscaping. Inlet rims need to sit slightly below the surrounding pavement, not proud of it, or water ponds around the grate.
Dumpster pads take heavy, stationary, often leaking loads and should be concrete with a section designed for it. Light pole bases and any conduit for lighting, signage, or future electric vehicle charging have to be installed before base and pavement, because cutting into a finished lot to add them is a rebuild, not a repair.
Striping is the last step and the one most likely to be rushed. Layout should be checked against the approved plan for stall width, aisle width, accessible stalls, and markings that discourage parking in access aisles. Painting from a tape measure instead of a string line produces a lot that looks wrong from the first day.
Construction Sequence That Avoids Rework
Parking lots reward a fixed order. Install erosion and sediment controls first, then clear and grub, strip topsoil, and stockpile it for later use. Rough grade to the design contours, then install storm drainage and utilities, including structures and pipe bedding, before the subgrade is finished.
- Erosion and sediment controls, plus construction entrance.
- Clearing, grubbing, and topsoil stripping.
- Mass cut and fill to rough grade, with fill placed in lifts and compacted.
- Storm drainage, inlets, and any under-pavement utilities.
- Fine grade the subgrade, then proof roll and density test it.
- Place and compact aggregate base in lifts, testing each one.
- Install curbs, islands, and pole bases.
- Pave in lifts, then compact and test density.
- Stripe, install signs, and clean inlets and ditches.
- Stabilize disturbed areas and remove temporary controls.
Skipping ahead, particularly paving before the drainage is complete or before the subgrade has been accepted, is how a lot ends up with patches and ponding in its first year. Rough versus finish grading explains the tolerance difference between the two stages.
Inspection and Acceptance: What to Test Before Paving
Three things get tested on a well-run lot: density, elevation, and slope. Density tests confirm that each lift of fill and base reached the specified percentage of maximum dry density, and they should be taken at the frequency the specification requires rather than at the contractor's convenience. Elevations confirm the subgrade and base are where the plan says they are, since a thin base under a thick asphalt lift is invisible until it fails.
Slope checks matter most at the accessible stalls, the access aisles, and the route between them. A digital level or smart level takes minutes and catches the 2.5 percent slope that a hand level and a good attitude will miss.
Before paving, walk the lot after a rain if possible. Water standing anywhere for more than a day is telling you where the low point actually is, regardless of what the elevations say.
Common Mistakes on Commercial Parking Lot Projects
- Designing the lot as pavement instead of drainage. Inlets and fall get added late, and the low point ends up in the wrong place.
- Using the light-duty section everywhere. Entrances, dumpster areas, and delivery routes then fail first.
- Paving over a non-uniform subgrade. No proof roll, no undercut, and cracks appear at the transition within a season.
- Treating accessible parking as a striping exercise. Slope, aisle width, and clearance are construction requirements, not paint.
- Forgetting conduit and pole bases. Cutting a finished lot for lighting is a rebuild.
- Leaving inlets unprotected during construction. Sediment fills the storm system before the lot opens.
A commercial parking lot is a short list of decisions executed in the right order: layout, drainage, subgrade, base, pavement, and markings. Get the earthwork and grading right, verify them with tests instead of assumptions, and the pavement has a chance to last its design life. For the pavement itself, see compacting asphalt pavement and concrete pavement construction.