Seeding and Stabilization After Grading

Once the dirt work is done and the grade is set, the last step is one of the most important: covering the bare soil before it washes away. Freshly graded ground is the most erosion-prone surface on any construction site. Seeding and stabilization lock the soil in place, protect the completed earthwork, and satisfy the stormwater permit that governs the job.
Why Bare Graded Soil Erodes So Fast
Grading strips away vegetation and loosens the soil structure, which is exactly what makes a site vulnerable. Rain hitting bare ground dislodges particles, and runoff carries them into ditches, storm inlets, and waterways. Sediment is the single largest pollutant by volume from construction sites, and it is the reason erosion and sediment controls are required in the first place.
Stabilization is also a financial and legal control. A site that erodes loses topsoil, undercuts pavements and foundations, and can trigger permit violations. Covering the ground promptly is cheaper than repairing the damage later.
Temporary vs. Permanent Stabilization
Temporary stabilization is short-term cover meant to hold soil in place until final work resumes. It is typically a fast-growing grass, mulch, or an erosion control blanket applied to a disturbed area that will sit idle for a while. Permanent stabilization is the final, long-term cover established on areas that are finished for good.
Under the EPA Construction General Permit (CGP), an area counts as stabilized when the activities needed to seed or plant it are complete, including the application of any non-vegetative protective cover such as mulch or an erosion control blanket. For most areas, final stabilization means a uniform perennial vegetative cover of at least 70 percent of the native background cover, unless a different standard applies in the site's state permit.
When to Stabilize: Permit Deadlines
Timing is not optional on a permitted site. The CGP requires operators to initiate stabilization as soon as practicable, and for many construction areas no later than 14 calendar days after reaching final grade. On sites that disturb five acres or less, stabilization must be completed within a 14-calendar-day timeframe once the area is at final grade and no further activity is planned there. Larger sites follow phased deadlines based on the area being disturbed.
In practice, do not wait for the deadline. The sooner a graded area is covered, the less soil you lose to the first storm. Where work will pause, temporary cover buys time and keeps the site in compliance.
Step 1: Prepare the Seedbed
Seed will not establish on a compacted, clodded surface. Start by making sure the area is uniformly graded and free of ruts, rocks, and large roots. Where construction traffic has compacted the soil, scarify or loosen the top two to three inches so roots and water can penetrate. If topsoil was stripped and stockpiled at the start of the job, respread it now to give the seed a rooting medium.
Complete seedbed preparation is one of the most commonly skipped steps, and it is the reason so many seeding jobs fail. A loose, even, finely textured surface gives seed soil contact, holds moisture, and gives seedlings a chance to survive their first dry spell.
Step 2: Lime and Fertilizer
Lime and fertilizer address the soil chemistry that lets grass grow. The right way to set rates is a soil test, which tells you the pH and the nutrient levels. Lime raises pH toward the 6.0 to 7.0 range most grasses prefer. Where a soil test is not available, published construction specifications commonly use a fallback rate of about 700 to 1,000 pounds per acre of a 10-10-10 fertilizer, with lime applied to bring pH into range.
Incorporate lime and fertilizer into the top few inches of soil rather than broadcasting them on the surface. Nutrients left on top are far less effective and more likely to run off with the first rain.
Step 3: Choose the Right Seed
Seed selection depends on the region, the season, the slope, and whether the cover is temporary or permanent. Permanent mixes usually combine cool-season grasses such as tall fescue with faster-establishing species, while temporary covers often use quick annual grasses or small grains such as rye to hold soil for a season.
Match the seed to the job. A steep, sunny slope needs species that establish quickly and root deeply. A shaded edge needs a shade-tolerant mix. Follow the seed rate on the mix label, and plant at the correct depth — most grass seed should sit only about a quarter to half an inch deep. Seed drilled into the soil establishes faster than seed broadcast on the surface, but broadcasting works when it is followed by a light rake or roll and a protective mulch.
Step 4: Apply Mulch or a Blanket
Seed alone will not survive on an exposed slope. A protective cover holds moisture, buffers raindrop impact, and keeps seed from washing away. Straw is the least expensive loose mulch and is typically applied at about one to two tons per acre. Because straw blows away easily, it must be anchored with a tackifier or crimped into the soil. Cover roughly 85 percent of the surface — enough to shade the soil without smothering the seed.
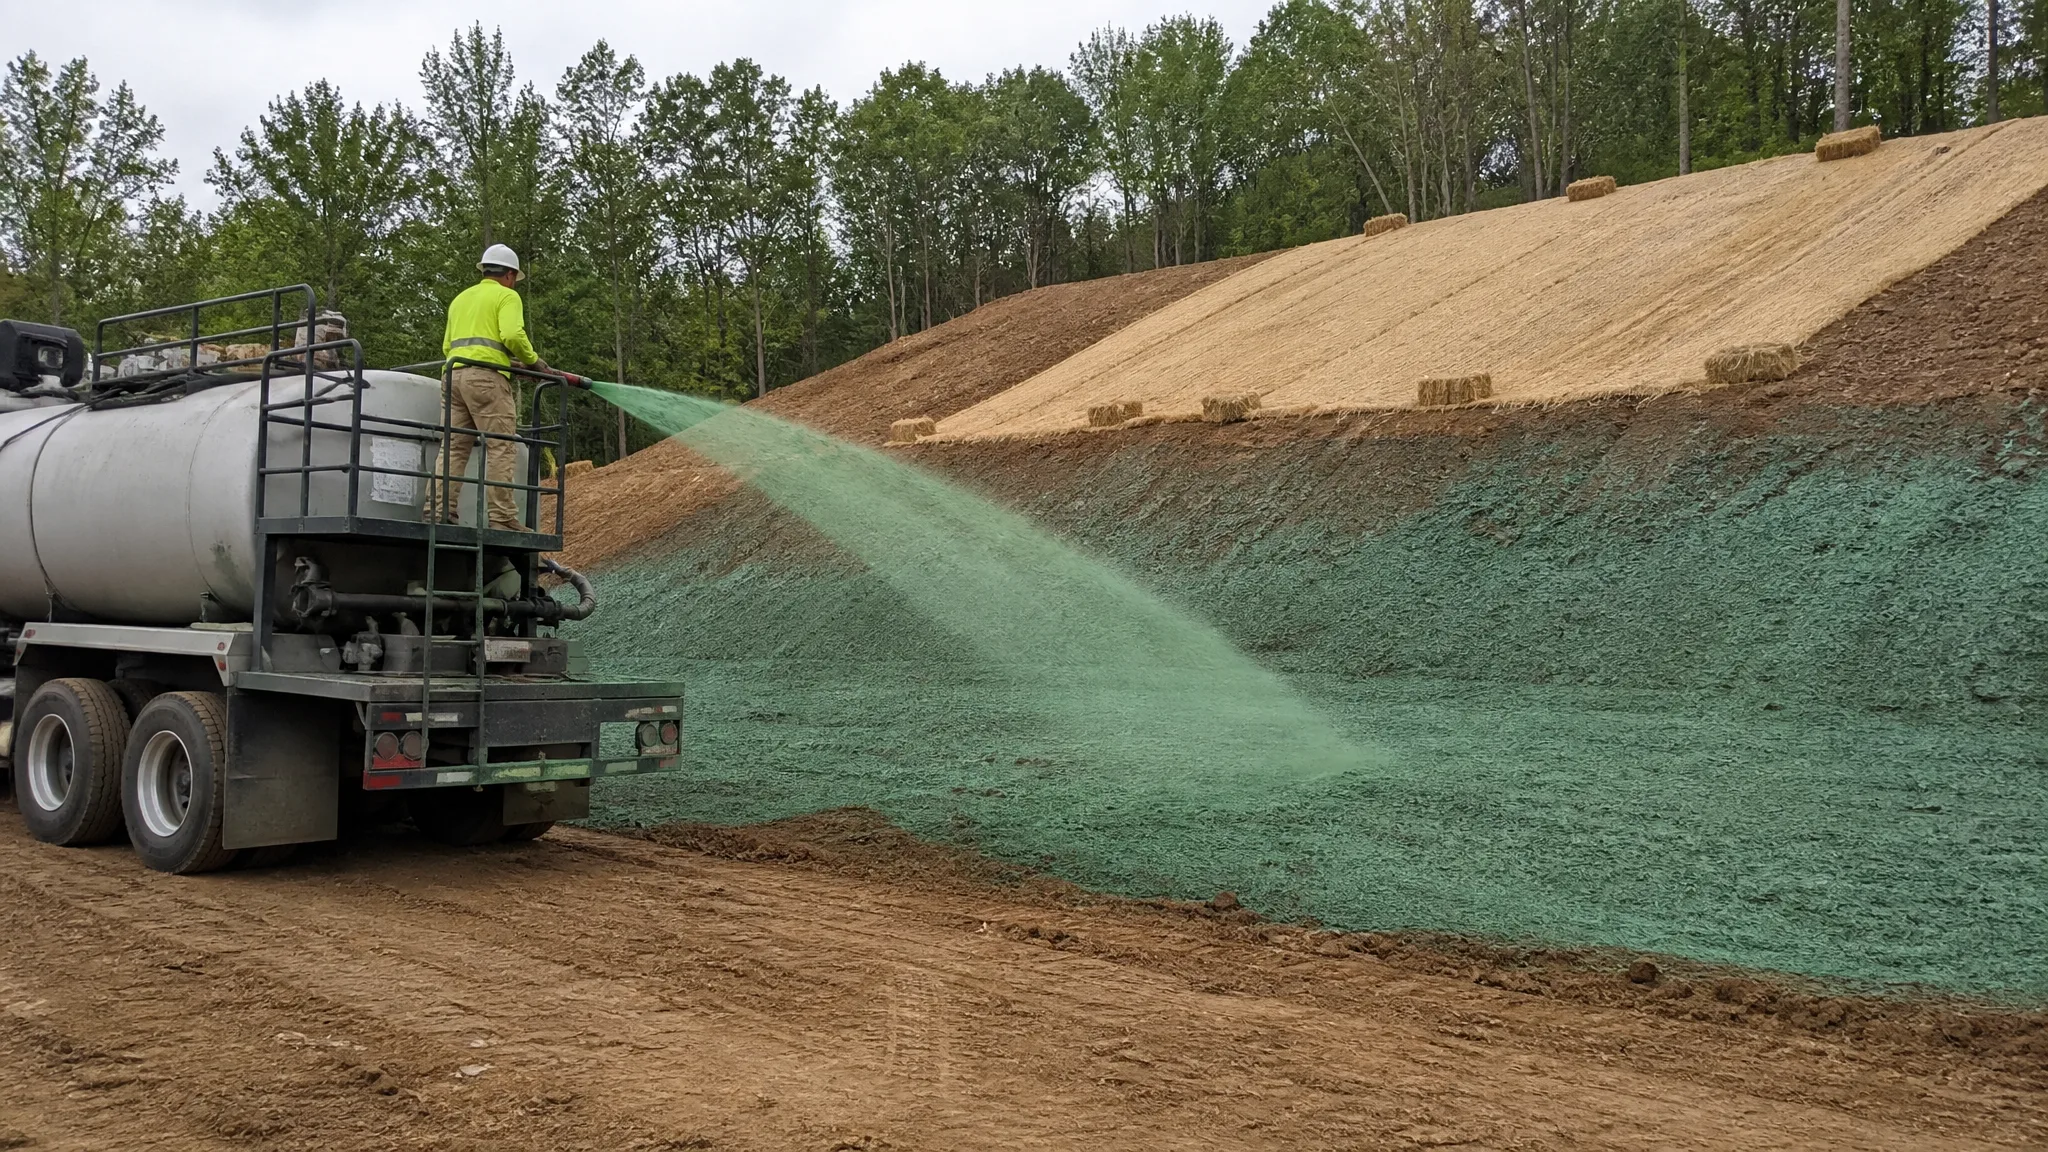
Hydraulic mulches, often called hydromulch or hydroseeding, are sprayed as a slurry of fiber, water, and often seed and tackifier. Application rates climb with slope steepness, from around 1,500 to 2,500 pounds per acre on gentle slopes up to 3,000 to 4,500 pounds per acre on steeper ground. Hydromulch is well suited to large or hard-to-reach slopes because it can be applied from the base or the top without workers on the face.
Erosion Control Blankets and When to Use Them
On slopes and in channels where mulch alone is not enough, an erosion control blanket (ECB) provides a stronger, longer-lasting cover. Blankets are made from straw, excelsior, coir, or synthetic fibers held by netting, and they are classified by how steep a slope and how much shear stress they can handle. Lighter classes cover gentle slopes, while heavy, slowly degrading blankets handle slopes up to 1:1 or steeper.
Installation matters as much as the product. Trench in the top edge of the blanket in a six-inch trench, stake it, and bury it before unrolling downslope. Overlap adjacent rolls a few inches on the sides and about 18 inches down the slope, and staple to the manufacturer's pattern. A blanket that does not lie flush against the soil will let water run underneath and fail.
Protecting Slopes, Swales, and Channels
Steeper slopes and concentrated-flow areas need more than seed and straw. Slopes steeper than about 3:1 horizontal to vertical generally warrant an erosion control blanket. Swales and drainage channels that carry concentrated flow may need a heavier blanket, a turf reinforcement mat, or riprap, depending on the velocity the channel is designed to carry. Pair these measures with the sediment controls downstream, such as silt fence and inlet protection, so any soil that does move is still captured on site.
Watering, Inspecting, and Re-Seeding
Newly seeded areas need moisture to germinate and establish. Irrigate lightly and frequently if the weather turns dry, and avoid heavy watering that washes seed away. Once the cover is up, moisture needs drop.
Inspect seeded areas regularly and after every significant storm. Look for bare spots, rills, and washed-out blankets, and repair them promptly. Under the CGP, stabilization measures must be maintained, and if a stand of vegetation fails to reach adequate cover, the area must be repaired — often by overseeding or reseeding, and by re-evaluating the seed, lime, and fertilizer choices that led to the failure.
Common Stabilization Mistakes
- Waiting until the deadline instead of stabilizing as soon as grade is reached.
- Seeding onto compacted or clodded soil with no seedbed preparation.
- Skipping lime or fertilizer, so seed germinates and then stalls.
- Planting seed too deep, where it cannot emerge.
- Spreading straw without a tackifier or crimping, and watching it blow away.
- Applying mulch so thickly that it smothers the seed.
- Installing a blanket that does not lie flush against the soil.
- Seeding into frozen or saturated ground, where seed cannot establish.
Seeding and stabilization close the loop on the earthwork. The excavation, grading, and drainage systems only perform as designed if the ground around them stays in place. Done correctly, final cover protects the work, keeps sediment out of waterways, and gets the job to its closeout with the permit in good standing. For related site work, see our guides on how to install a silt fence, what a SWPPP is, and riprap for erosion control. The cover also depends on the grade it sits on, so review rough grading versus finish grading and how much slope a yard needs for drainage. If the soil itself is weak, start with soil stabilization for unstable subgrade, and if the season turns cold, plan around cold weather earthwork.