Concrete Washout on a Construction Site

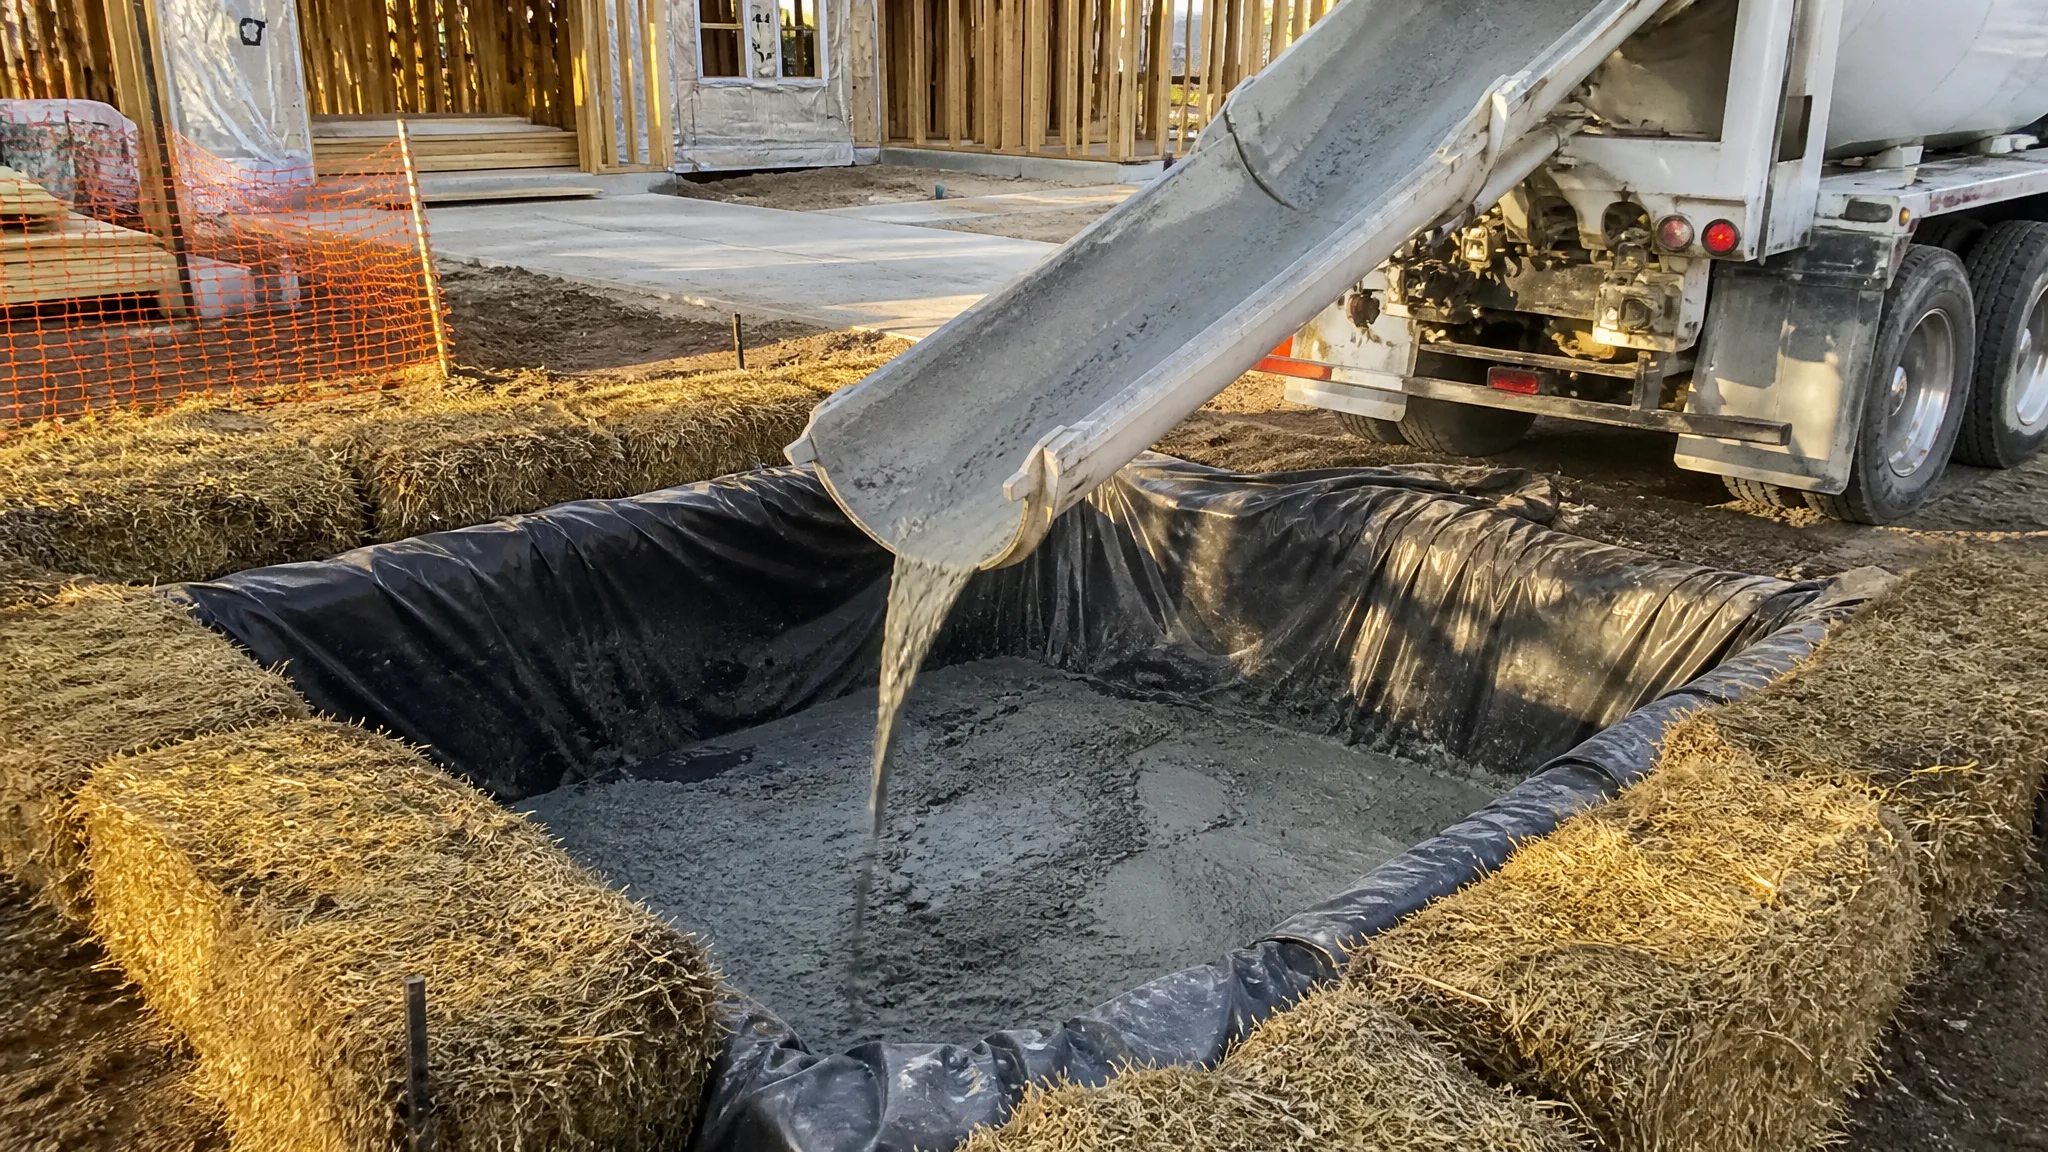
Concrete washout is the gray, gritty water left over after a mixer chute, pump hopper, wheelbarrow, or finishing tool gets rinsed. On a lot of sites it is treated as housekeeping — something to deal with after the trucks leave. In practice it is a regulated discharge, and it is one of the most common findings in a stormwater inspection because the fix is simple and the failure is visible from the street.
The water is caustic enough to kill fish, it carries metals leached out of cement, and it does not stop being a problem when it soaks into the ground. This guide covers what the rules actually require, how to size and build a washout that survives a pour day, and what an inspector looks for when they walk up to it.
What Counts as Concrete Washout
Washout is not limited to the chute of a ready-mix truck. It includes the drum, the pump hopper and lines, mortar mixing stations, grout and stucco cleanup, and the buckets, trowels, screeds, floats, and wheelbarrows used to place the material. Anything cementitious that gets rinsed produces the same alkaline slurry, and every one of those sources needs a designated place to go.
That matters because most crews handle the truck correctly and then rinse tools over a bare spot behind the house. Both are washout, and both are the same violation.
Why Washwater Is Regulated
Fresh cement washwater commonly runs around pH 12. That is roughly as caustic as household ammonia and far outside the range aquatic life can tolerate — the U.S. Environmental Protection Agency notes that healthy freshwater habitat sits in the 6.5 to 9 range, while federal stormwater permits typically limit discharges to roughly 6.0 to 9.0 standard units.
The damage goes beyond pH. Washwater carries dissolved metals, and when it percolates into soil it alters soil chemistry, inhibits plant growth, and can move toward groundwater. A single washout dumped on the ground beside a storm inlet can produce a fish kill a quarter mile downstream.
The Construction General Permit, which covers most sites that disturb an acre or more, lists wastewater from concrete washout among prohibited discharges unless it is managed by an appropriate control. State and local permits frequently go further and require a designated washout on any site receiving ready-mix deliveries, regardless of acreage. If you are still sorting out how washout fits into the rest of your permit obligations, start with what a SWPPP actually contains and how the plan is supposed to be implemented in the field.
The Four Requirements That Actually Matter
Strip away the paperwork and most washout rules reduce to four points. First, the facility has to be designated and installed before concrete is placed — not built after the first truck arrives. Second, it has to contain all of the liquid and all of the solids generated between cleanouts.
Third, nothing may discharge. That means no overflow during rain, no seeping through a torn liner, and no pumping the water to a storm drain, ditch, or sediment basin. Fourth, the facility has to be inspected and maintained, which in practice means checking it daily, before storms, and after them.
If a site can answer those four questions with evidence, it will survive most inspections. Most violations are not exotic — they are an undersized pit, a liner full of rips, or a truck driver who was never told where to go.
Choosing the Type of Washout
A lined in-ground pit is the most common solution on residential and light commercial work. It is cheap, it is out of the traffic path, and it keeps the slurry where a vacuum truck can reach it. The pit needs a puncture-resistant liner, a flat bottom, and side slopes gentle enough that the liner does not bridge and tear.
An above-grade facility built from berms, sandbags, or staked straw bales over a liner works where excavation is impractical or groundwater is close. One municipal policy sets a minimum footprint of about ten feet by ten feet for an above-grade washout, with capacity for everything generated between cleanouts. Prefabricated steel or poly washout containers are the third option — they cost more per use, but they are hauled away whole, which simplifies disposal on tight urban sites.
Where groundwater is the constraint, the same dewatering judgment that applies to any open excavation applies here: a pit that fills from below will never hold slurry, no matter how good the liner is. The techniques in dewatering an excavation are worth reviewing before you dig the hole.
Unlined pits are the option to treat with suspicion. Some manuals allow them only where the soil has enough buffering capacity to protect groundwater, and prohibit them in sand or silt, in high groundwater, near wells, or where the pit will be in service longer than a year. If any of that is uncertain, line it. The material cost is trivial next to a cleanup order.
Sizing the Facility
Size the washout for the pour you are actually doing, not the pour you did last month. Capacity has to cover the washwater from every truck and pump on the job plus whatever rain falls into it before the next cleanout, and the useful rule of thumb is that a facility is full at about 75 percent — beyond that, a normal rain event turns it into an overflow.
On a large slab, a subdivision with several active blocks, or a commercial site with multiple pours per week, one central washout usually fails. Crews will not drive a quarter mile to rinse a chute. Put a facility within easy reach of each active pour area and sign it clearly from the truck route.
Two siting rules are easy to forget. Never place a washout inside the footprint of a permanent stormwater practice that will be built later, and never place one where the pit will have to be abandoned mid-project because grading is about to cut through it.
Siting and Setbacks
Locate the washout away from anything that carries water: storm drains, open ditches, swales, waterbodies, wetlands, and the downhill edge of the site. A common pattern in local manuals is 50 feet from storm drains, ditches, and waterbodies, 100 feet from sensitive resource areas, and a much larger separation from drinking water wells. Check the local requirement rather than assuming; the numbers vary by jurisdiction and some are considerably stricter.
The facility also has to be usable. That means an all-weather approach, typically gravel or crushed stone, so trucks can reach it without rutting or tracking mud onto the road. If the washout is not visible from the pour location, add signage that tells drivers where it is — an unsigned pit is a pit that gets bypassed. A properly built temporary construction entrance solves the same tracking problem at the gate, and the two controls are usually inspected together.
Consider where a spill would go. A washout sited at the top of a slope above a storm inlet is a bad bet regardless of how good the liner is.
Building a Lined Pit
Excavate a shallow, flat-bottomed pit with sides sloped enough to hold a liner without bridging. Remove sharp rock, roots, and debris from the excavation — most liner failures start as a puncture that nobody noticed on day one. If the subgrade is soft, a thin sand or fine-gravel cushion under the liner is worth the hour it takes.
Lay a heavy polyethylene liner and carry it well over the top of the pit, then weight or trench the edges so it cannot slide in. A reinforced liner of at least 10 mil is commonly specified; thicker is better where trucks back close to the edge. Build a low berm or place straw bales around the perimeter as a secondary barrier, and keep the pit shallow enough that a chute can reach it without the truck leaving firm ground.
Finally, mark it. A washout that looks like a random hole in the ground will collect trash, spoil, and construction debris, and every one of those items becomes a handling problem at cleanout.
Managing the Pour Day
Most washout failures happen in the two hours around a pour, not in the weeks between them. Brief the ready-mix drivers before the first truck arrives and point out the facility; the driver is not going to hunt for it. Include the requirement in the purchase order or delivery agreement so it is not a verbal suggestion.
Handle one truck at a time at the pit, and rinse the chute over the pit rather than over the ground beside it. Return excess concrete to the plant or use it — never dump it in the washout as a disposal method, because it consumes capacity you will need by mid-morning. Pump line cleanup and tool washing go in the same place, or into a bucket that gets emptied there.
Keep washwater out of excavations and footings. A footings trench that fills with alkaline slurry is a concrete placement problem and a disposal problem at the same time.
Inspection and Cleanout
Check the facility daily and after any significant rain. Look for tears in the liner, berms that have been driven over, and a liquid level approaching 75 percent of capacity. When it gets there, vacuum the liquid off or let it evaporate, and lower the level or cover the pit before a forecast storm. The same walk should cover the rest of the site's sediment controls, since a silt fence that has been driven over and a washout with a torn liner tend to fail on the same day.
Once the solids have hardened, break them out and send them to a recycler or disposal facility that accepts hardened concrete. Do not pump washwater into a sediment basin and call it treated — a sediment basin settles dirt, it does not neutralize high-pH water. Discharging treated washwater is a permit question, not a field decision, and it belongs to whoever holds the permit.
Closeout, Disposal, and Records
At the end of the concrete work, remove the hardened solids and any contaminated soil beneath the liner, backfill the depression, and stabilize the surface. Keep the haul tickets. If the material went to a recycler, the ticket is your proof; if it went to a landfill, the ticket is your proof of that too. The weight and volume math is the same as any other debris stream, and the handling rules in demolition debris disposal apply to broken-out washout solids as well.
Documentation is what separates a defensible site from an expensive conversation. Photograph the installed facility before the first pour, log the inspections, and record each cleanout. Under a stormwater permit, the inspection log is the record that the control existed and was maintained.
The concrete itself has its own paper trail. Slab prep, removal, and the pour sequence are covered in preparing a site for a concrete slab, and if the project involves tearing out an existing slab first, the sequencing in removing a concrete slab is worth reading before the demo crew mobilizes.
Common Mistakes
- Building the washout after the first truck arrives instead of before the pour.
- Undersizing the pit, then letting it overflow during a rain event.
- Using a torn or too-thin liner, or one that was never carried over the bank.
- Failing to tell drivers where the facility is, so chutes get rinsed on the ground.
- Dumping leftover concrete into the washout and burning the capacity.
- Pumping washwater to a storm drain, ditch, or sediment basin.
- Leaving an unlined pit in sandy soil or near a well.
- Skipping the closeout, so a filled pit becomes an unmarked hazard in the finished yard.
- Treating tool washing as exempt when it produces the same caustic water as a truck chute.
None of this is complicated, and that is the point. A washout is one of the cheapest controls on a site, and the difference between a compliant one and a violation is usually an hour of planning before the first mixer shows up. Get it right once per project and it stops being a topic in inspections at all. Pair it with basic dust control and a clean track-out pad, and the housekeeping findings that drag out inspections tend to disappear.